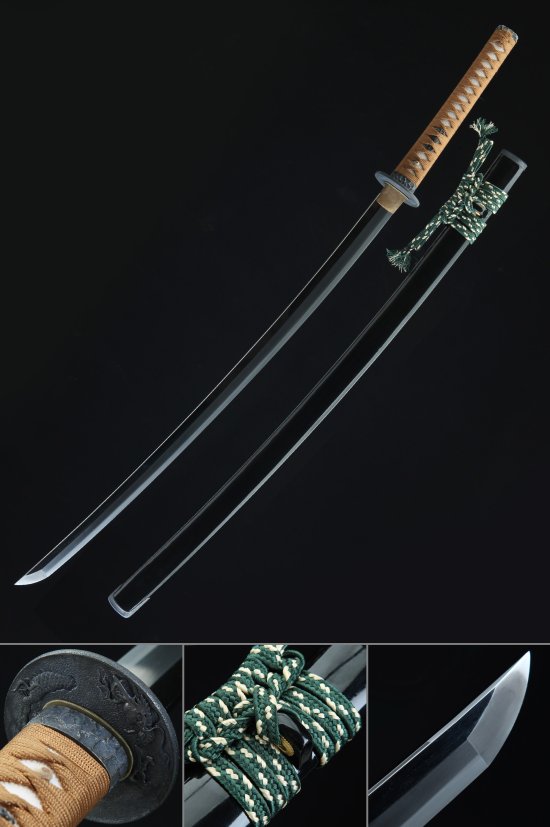
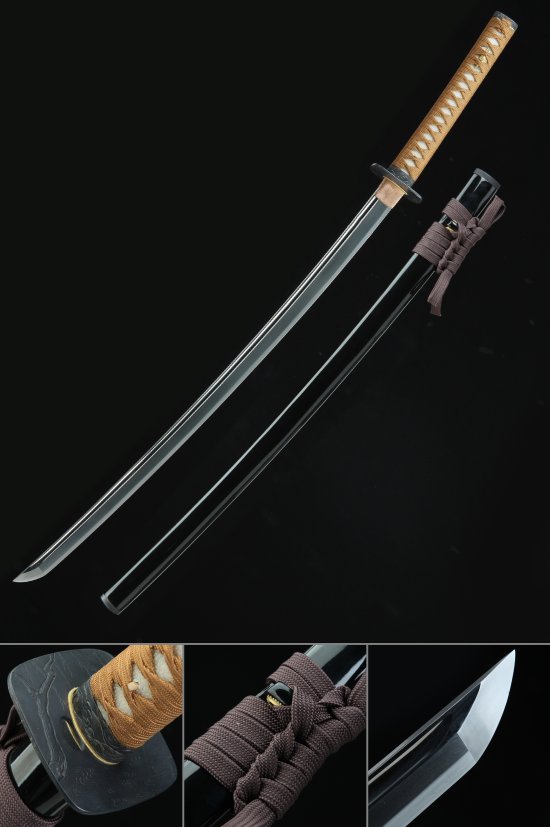
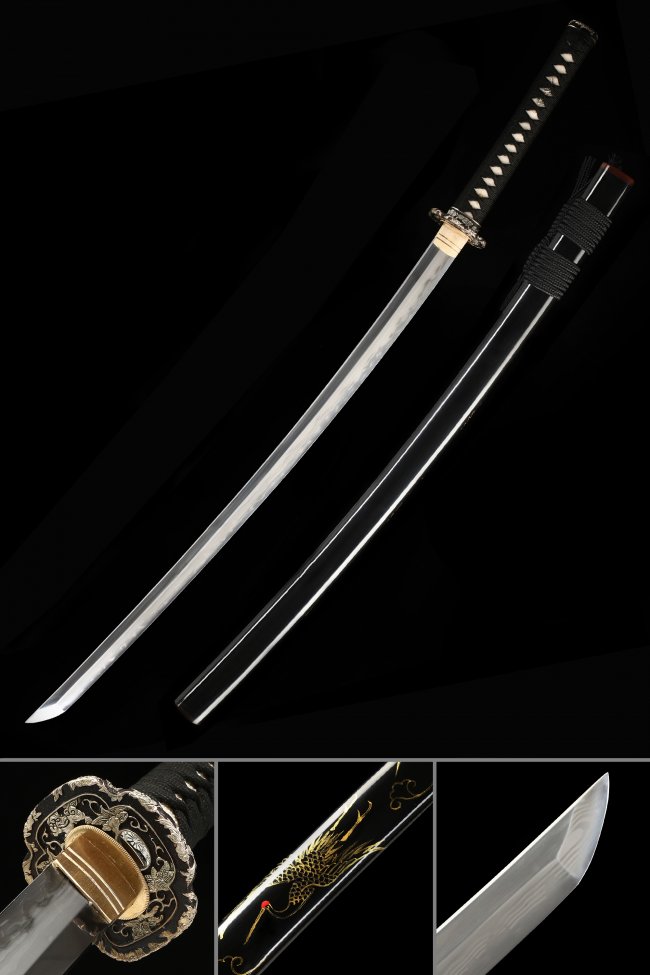
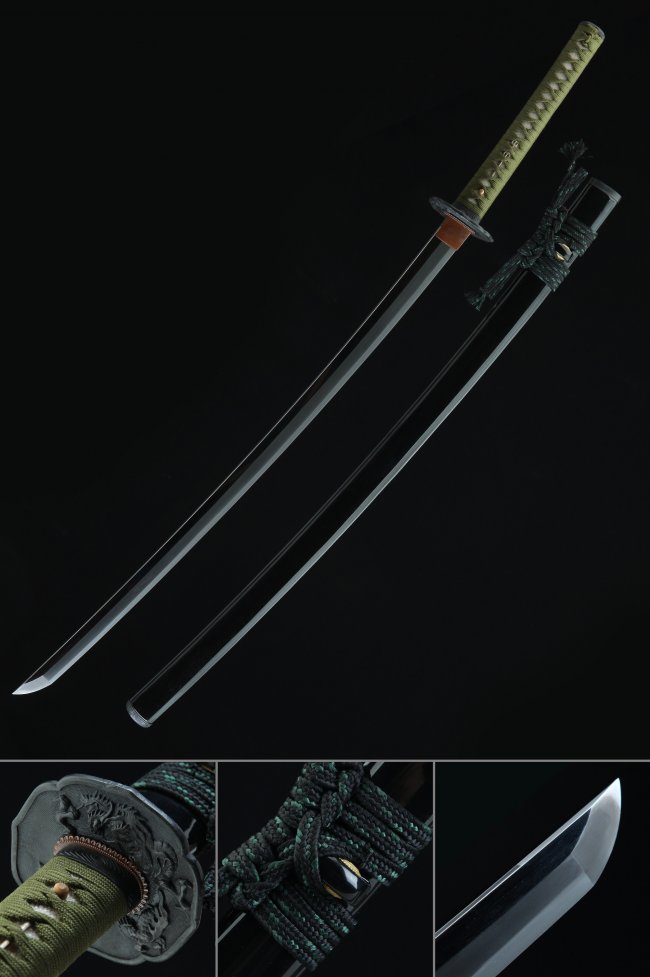
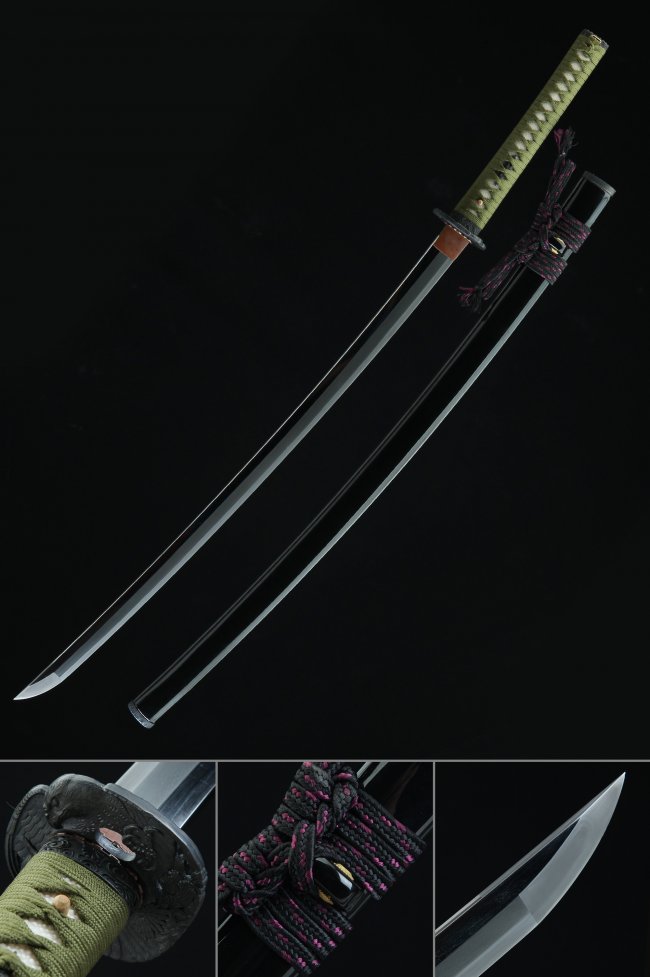
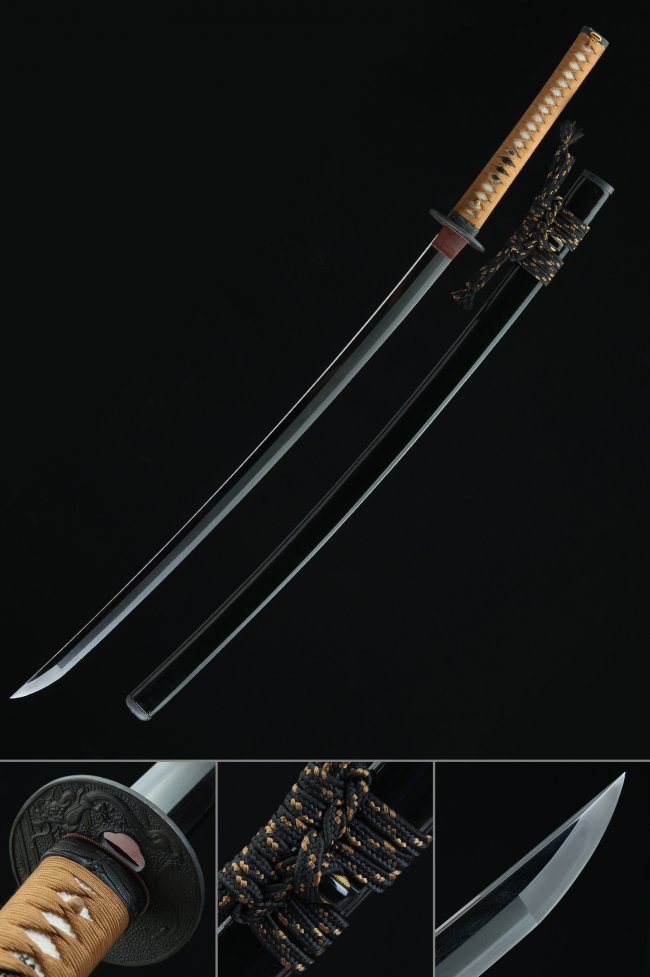
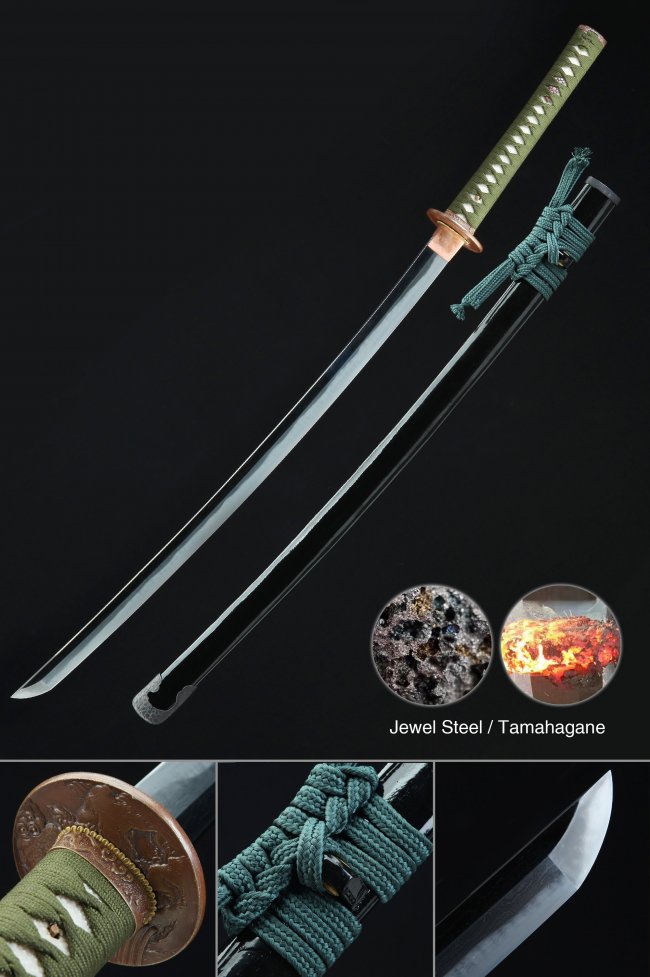
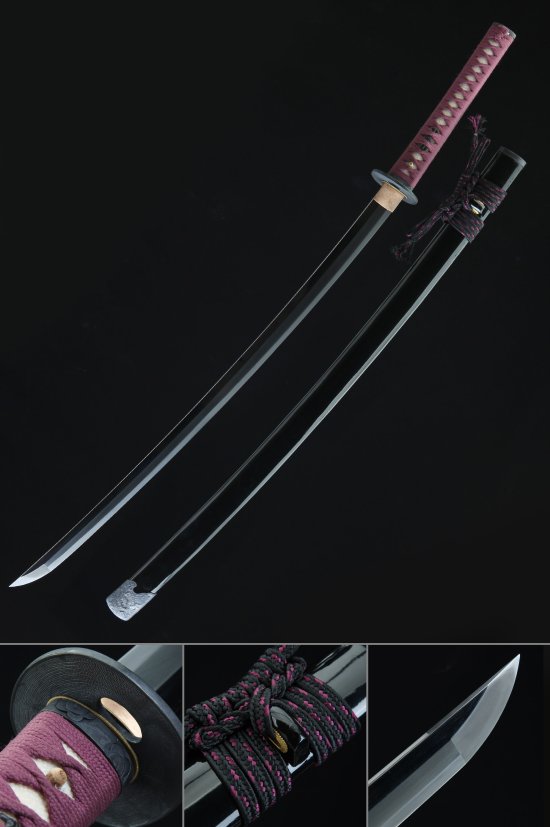
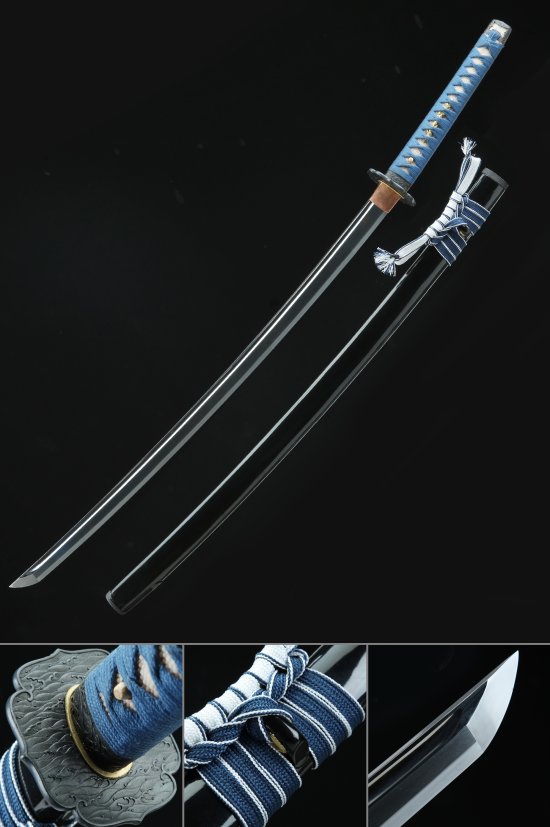
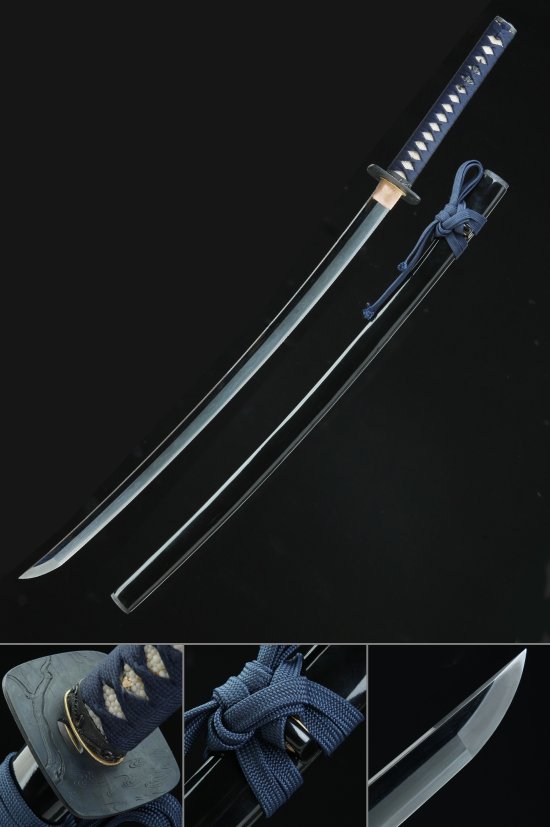
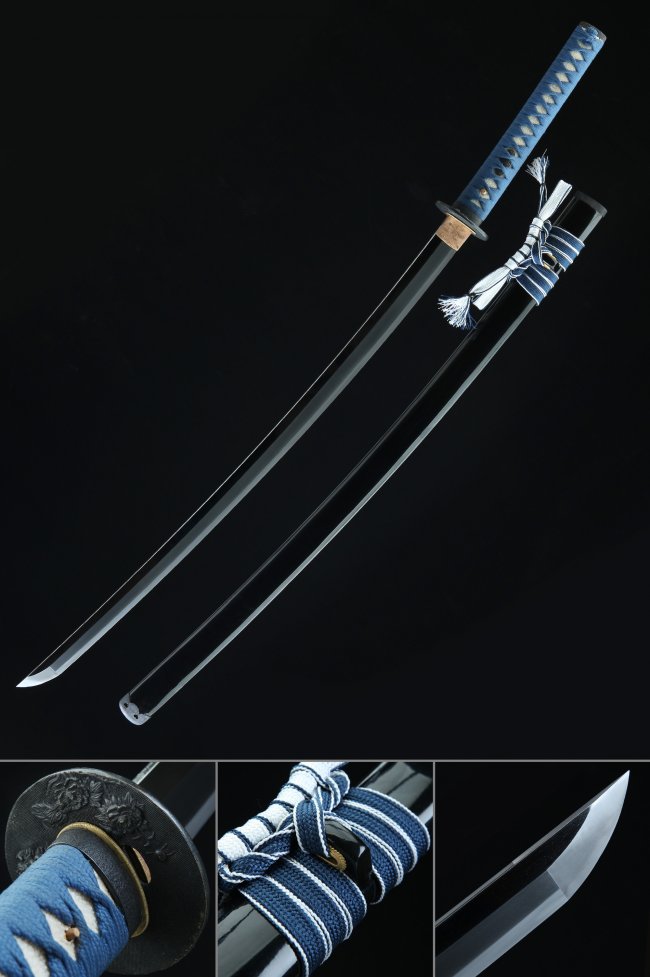
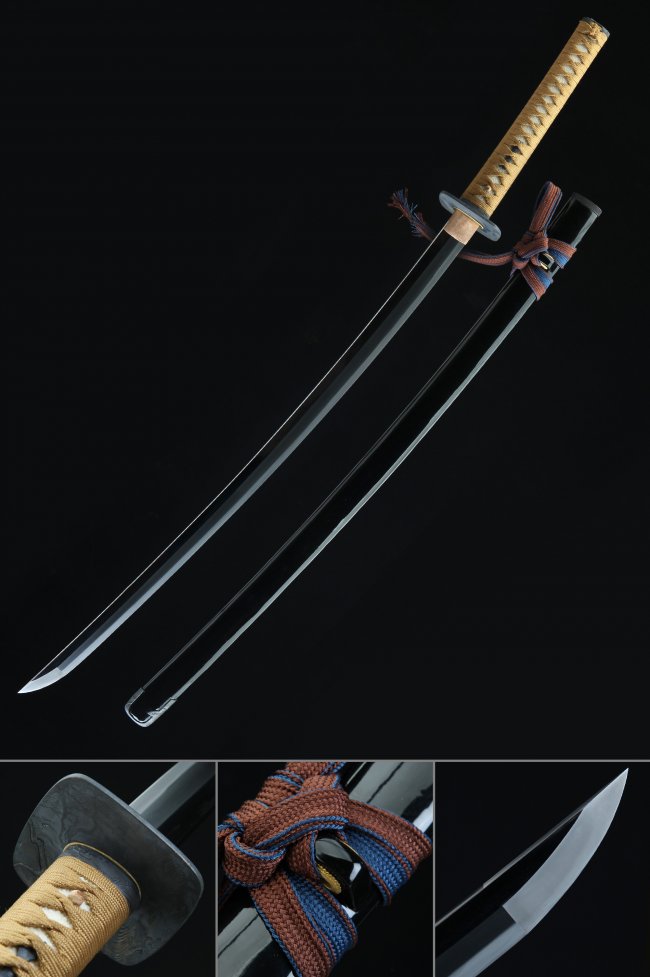
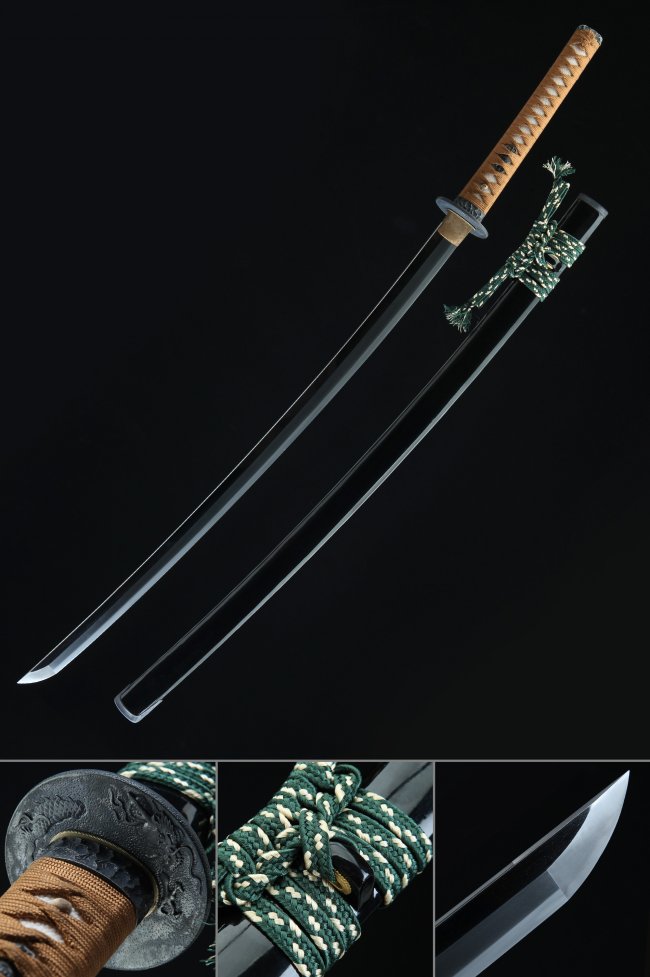
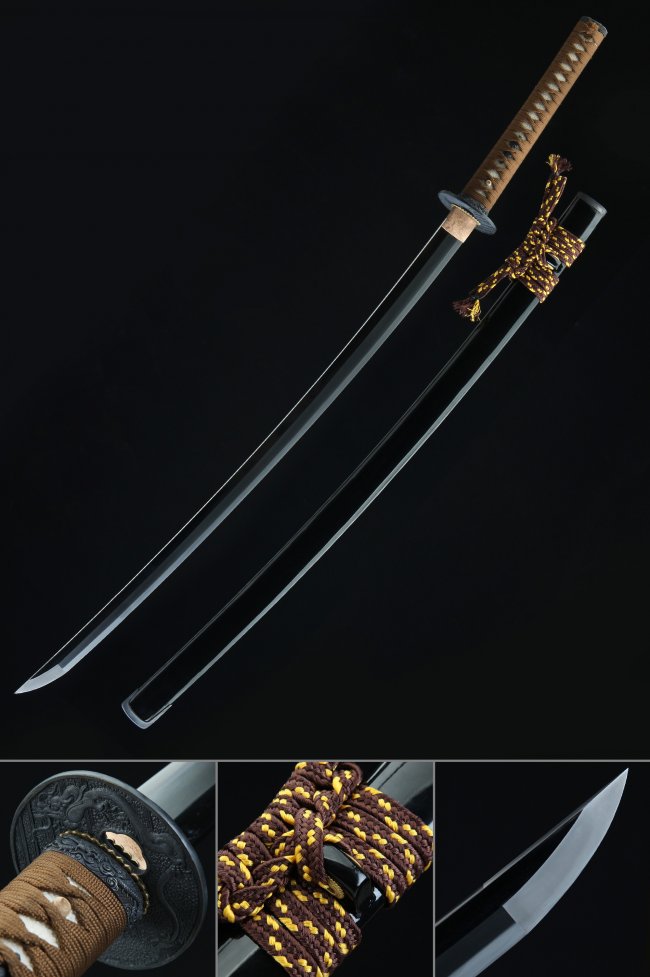
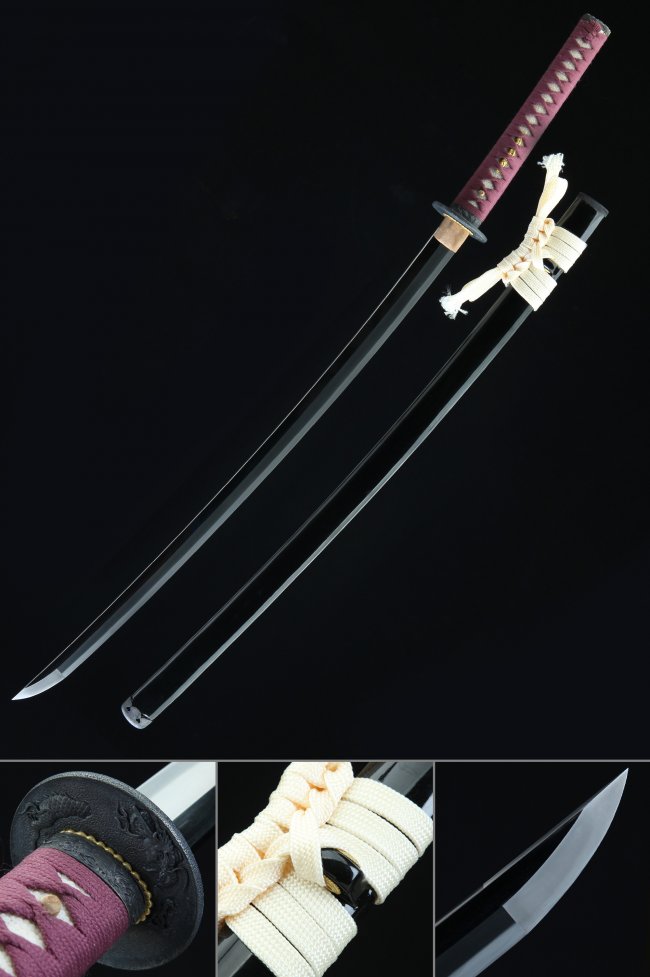
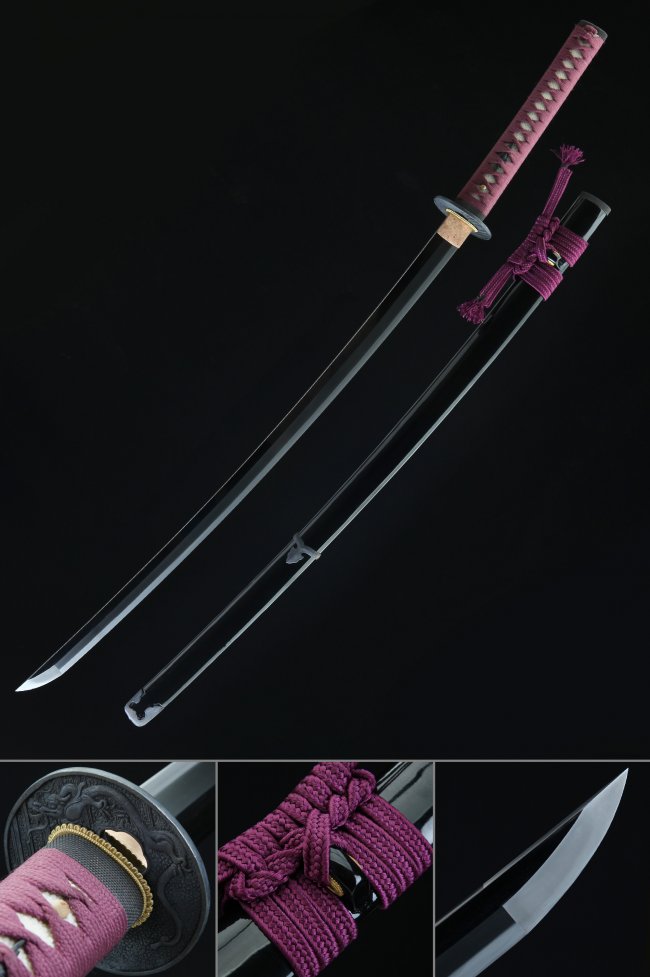
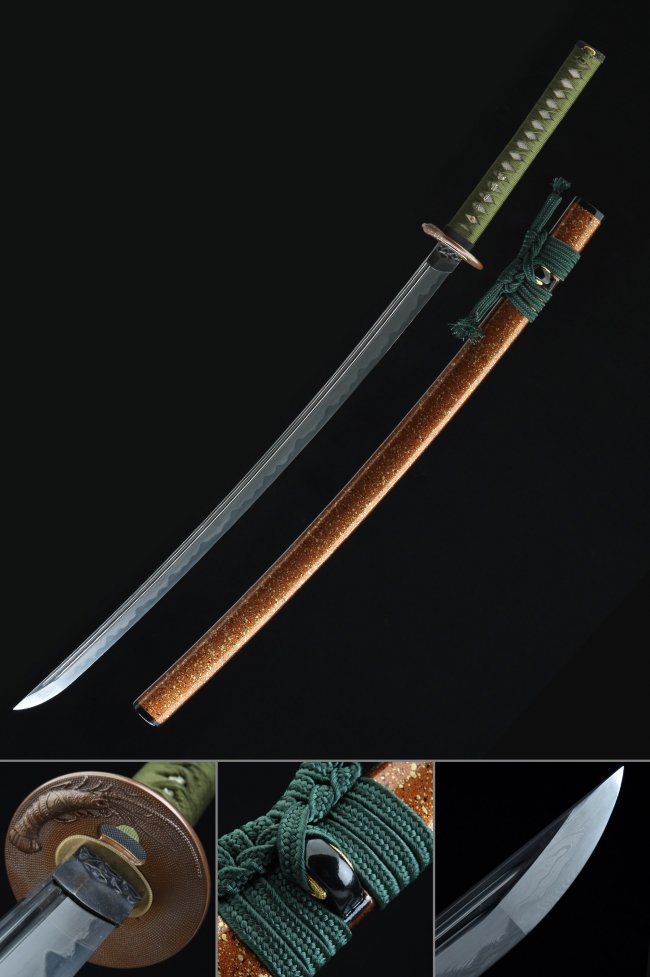
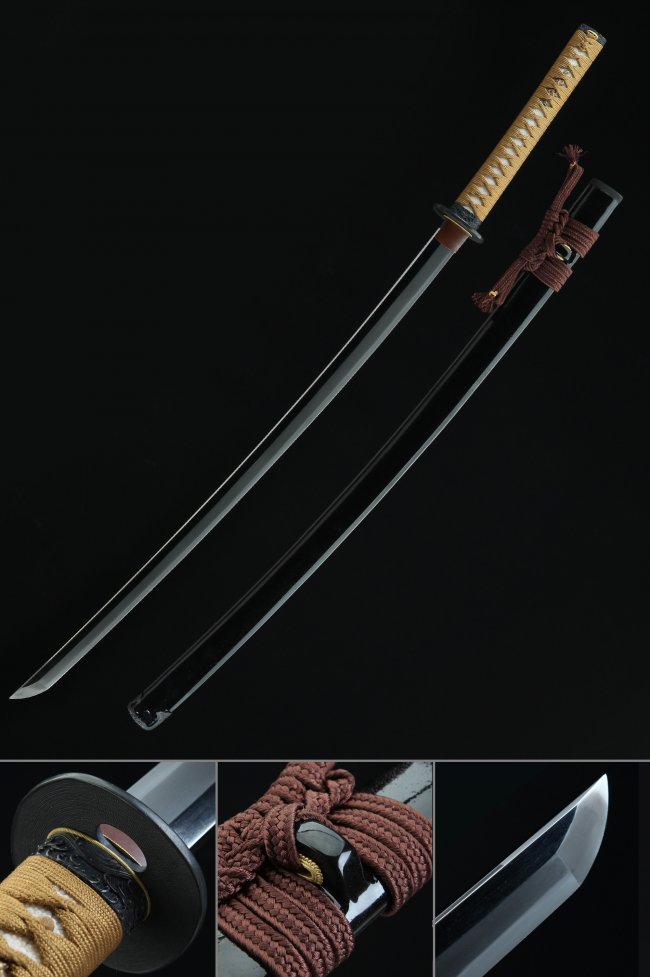
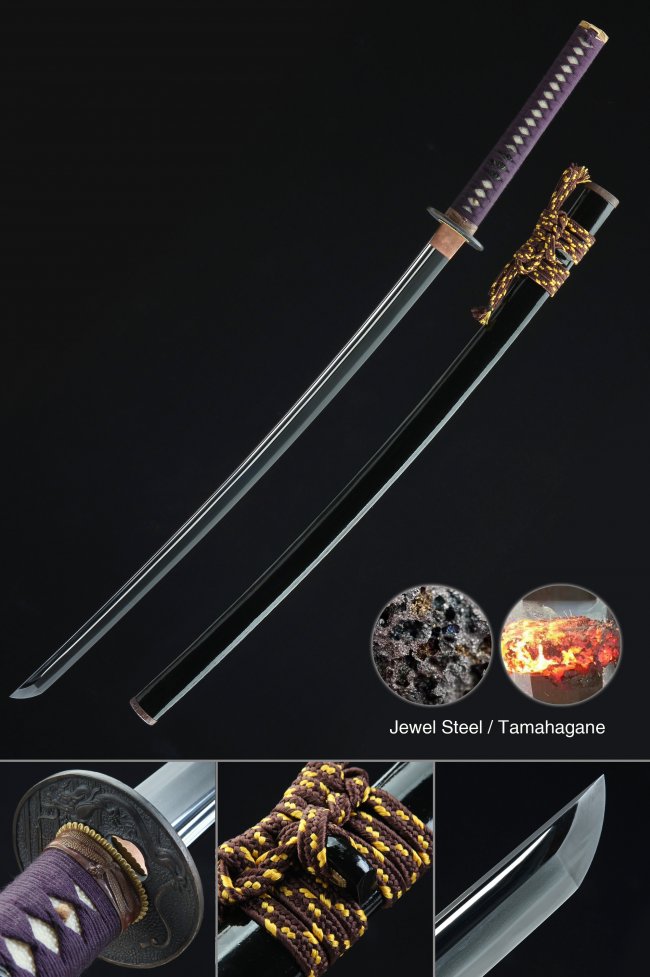
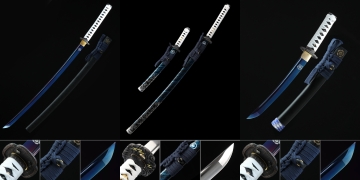
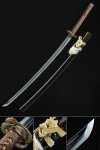
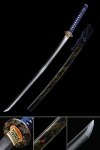
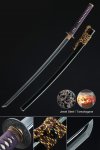
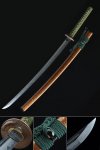
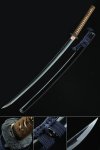
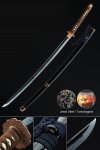
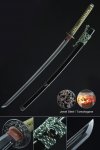
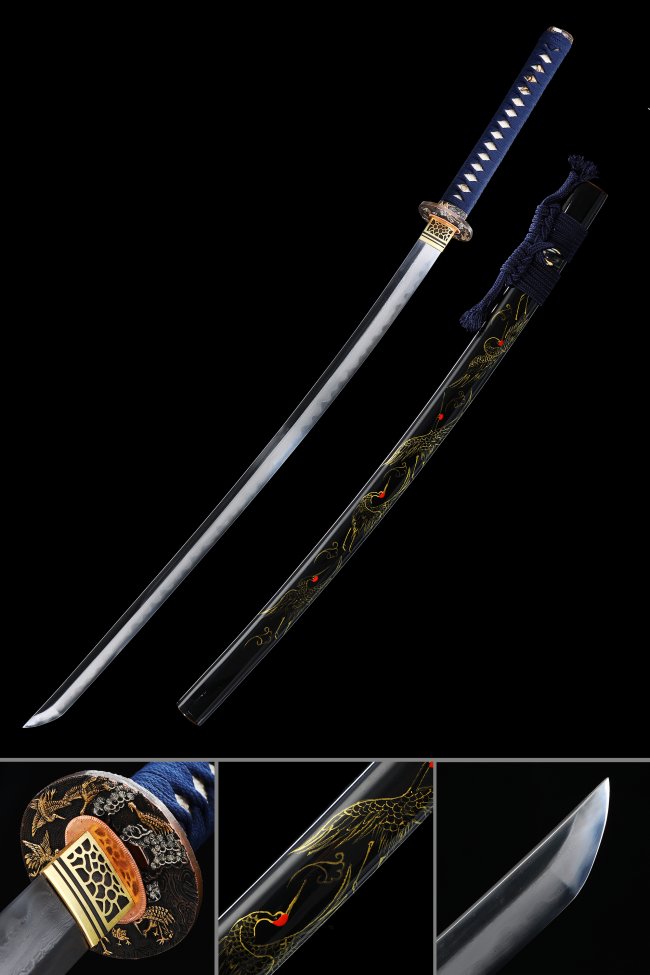
Battle Ready Katana

Every sword in our battle ready katana collection is built on one principle — function over ornament. That means a genuine full tang sword forged from real high-carbon tool steel, heat-treated to a documented hardness, and shipped with a live cutting edge ready for tatami the day it arrives. Choose from an entry-level 1060 carbon steel platform for your first cuts, step up to 1095 for sharper retention, or invest in a T10 clay-tempered showpiece with a live hamon line. Each handmade katana comes fitted with a hardwood saya, genuine ray-skin tsuka wrap, and iron or brass tsuba built for hard practice. From weekend tameshigiri students to dedicated collectors, every buyer finds the right tier here — and every order ships free within the United States, backed by a 30-day guarantee and the confidence of 100,000+ customers averaging 4.9 out of 5 stars across 9,800+ verified reviews.

Showing 128 Products

Frequently Asked Questions

What is a battle ready katana?

"Battle ready" is a functional specification, not a marketing phrase. A genuine battle-ready katana must satisfy all four criteria below — fail any one and the sword is a display piece, not a cutter.

Full-tang construction. The nakago is the same continuous piece of steel as the blade, running the full length of the handle at close to full blade thickness, held by real bamboo mekugi pegs through matched drilled holes. In a display sword, the blade typically ends at the shoulder and a thin threaded rod is welded on and bolted through a decorative handle. That weld concentrates stress and eventually fractures mid-swing — the blade flies free. This is the most frequently documented injury mode with budget "samurai swords" sold online.

High-carbon tool steel. Functional blades are forged from heat-treatable alloys: 1060, 1095, T10, 9260 spring steel, or folded/clay-tempered variants. Stainless steel is display-only — the chromium content changes the crystal structure in a way that makes long blades brittle under lateral bending rather than flexible, and a stainless blade can snap at the habaki on a single hard cut.

Proper heat treatment. The edge must be quenched and tempered to functional hardness (54–62 HRC depending on grade) while the spine retains toughness to absorb shock. Clay-tempered blades achieve this with a traditional clay slurry; through-hardened blades do it with precise temperature control in water or oil. A display sword is typically not heat-treated beyond cosmetic surface finishing.

A live sharpened edge. The sword ships with a usable cutting bevel on the full length of the ha — not dull-polished for safety, not sharpened only on the tip. Ready to cut tatami on day one.

A fourth category to be aware of: the training katana (iaito) is an unsharpened alloy blade designed specifically for dojo solo kata. It is neither battle-ready nor display — it is a practice tool that deliberately trades a live edge for safety during close-quarters drills. All three categories — display, iaito, battle-ready — are engineered for one purpose each, and none is interchangeable with the other two.

Every sword in this battle ready katana collection passes all four tests and is clearly labeled with its steel grade and tang construction. If a sword in our catalog is display-only, we say so explicitly.

Which steel should a beginner choose?

For almost every first-time buyer, 1060 carbon steel is the right starting point, and the reason is forgiveness. Here is the full comparison.

1060 carbon steel. Roughly 0.60% carbon, heat-treated to 54–58 HRC. The most forgiving functional grade on the market. The single most common beginner error in tameshigiri is hasuji — edge alignment off-perpendicular to the target at the moment of impact. On a 1060 blade, a bad angle usually produces a minor bend or deflection rather than a chip. A bend can sometimes be professionally corrected; a chip is permanent and may require a full re-polish. That margin of tolerance makes 1060 the ideal first teacher. It is also typically the most affordable tier, lowering the stakes of learning. Browse the 1060 line.

1095 carbon steel. Carbon rises to ~0.95%, hardness to 58–60 HRC. The edge is noticeably sharper out of the box, holds that sharpness longer between sessions, and polishes to a cleaner finish. The trade-off is brittleness — off-angle cuts are more likely to chip the edge rather than bend the blade. Excellent second or third sword for a cutter who has built reliable hasuji on 1060 and wants longer edge life. Browse 1095 swords.

T10 tool steel. 1095-grade carbon plus tungsten — refined grain, superior wear resistance, 60–62 HRC edge hardness. Best-in-class edge retention and the most striking polish of any production grade. Also the most brittle of the three carbon grades, making it the most demanding of clean technique. Not a beginner's first sword. The right long-term showpiece cutter once you have earned the upgrade. See T10 clay-tempered.

9260 spring steel. Silicon-manganese alloy with exceptional flex recovery. The blade can flex through extreme angles and return to true without permanent set. Moderate hardness (~54–56 HRC) means lower edge retention than 1095, but unmatched resilience under unusual stress. Ideal choice for iaido practitioners, solo kata in confined spaces, and anyone who worries about accidental wall or floor contact during practice. See spring steel katana.

Clay-tempered is a process applied to any grade above. The clay slurry creates a hard edge, soft spine, and the visible hamon line that characterizes a traditional Japanese blade. Clay-tempered T10 is the production peak. Folded steel and Damascus add layered grain patterns primarily for visual distinction.

Definitive recommendation: 1060 for your first sword, no exceptions for most buyers. Spend six months cutting with it. Then upgrade to 1095 or clay-tempered T10 once your hasuji is consistent and clean. Jumping straight to T10 as a first sword is a fast route to a chipped edge and a disappointed owner.

Full-tang vs rat-tail — why it matters?

The tang — nakago in Japanese — is the portion of the blade that extends into the handle. It is the most important structural feature of any sword, and it is the first place a low-quality katana fails under real use.

Full tang. The tang is the same uninterrupted piece of steel as the blade, running from the habaki shoulder to the base of the kashira pommel at close to full blade thickness. It passes through the solid hardwood tsuka core and is locked in place by one or two bamboo mekugi pegs through matched holes in both the wood and the steel. When the sword strikes a target, the impact travels through the blade and directly into the full-length tang — they are literally one piece — and is distributed along the entire tsuka. The blade cannot separate from the handle under normal cutting loads. Both hands may grip the tsuka without any concern that the blade will fly loose. Every sword in the full tang and battle ready lines is built this way, with genuine bamboo mekugi and solid hardwood cores.

Rat-tail tang. The blade ends at the shoulder. A thin threaded rod — 6–8 mm diameter, the "rat tail" — is welded to the base of the blade. The decorative handle assembly is threaded onto this rod and bolted with a nut at the kashira. The entire blade-to-handle connection rests on one weld.

The problem is physics. The weld is a sudden transition from thick blade steel to narrow rod, joined by a weld narrower and weaker than either component. Every swing creates cyclic stress at precisely that transition point. A vigorous practice swing, a cut against resistance, or even repeated air-swings will eventually initiate a fatigue crack. When the weld fails — sometimes on the first hard cut, sometimes after several sessions — the blade launches free at whatever speed the swing was traveling. This is the most frequently documented injury mode with budget "samurai swords" bought online or at mall kiosks. Every experienced cutting instructor refuses to permit rat-tail swords in class for exactly this reason.

How to identify before buying. Any honest seller explicitly states "full-tang" if the construction is correct. If a listing says "stainless steel" without naming the tang type, assume rat-tail. If the price is under $80 for a 40-inch sword, assume rat-tail. At TrueKatana, every battle-ready sword is full-tang and we clearly label display katana as display-only, with no ambiguity between the two categories.

How do I oil and maintain the blade?

Maintaining a carbon-steel katana is simple and non-negotiable. Carbon steel is why the blade cuts well; rust is the trade-off. Done correctly, the routine takes under ten minutes per session. Done wrong — or skipped — visible surface rust can appear in under 24 hours in a humid environment.

Core principle. Any time bare carbon steel contacts moisture — humidity, fingerprints, tatami water, sweat, rain — oxidation begins. Your job is to maintain a thin protective oil film on every exposed surface of the blade at all times.

Tools you need: choji oil (food-grade mineral oil with a trace of clove, $6–$10 per bottle), three or four lint-free cleaning cloths or soft cotton tissues, an uchiko powder ball (optional, for post-cutting cleaning), and a spare mekugi peg. Total kit cost under $25.

After every handling session — including simply drawing the sword to show someone — dry-wipe the full blade from habaki to kissaki with a lint-free cloth, then apply a thin choji oil film with a fresh cloth. The film should be barely visible, not wet. Fingerprint acids etch carbon steel within 24 hours.

After cutting sessions with wet tatami or water: wipe the blade immediately at the target stand, before sheathing. At the workbench, clean any stuck fibers with uchiko if needed, re-oil the full blade, and check the inside of the saya koiguchi for any moisture transferred from the target.

Products to absolutely avoid: WD-40 (a water displacer that evaporates and leaves steel unprotected within a day), cooking oils (all go rancid and create acid residue that promotes oxidation), 3-in-1 oil, motor oil (detergents damage lacquer and the same' wrap). On a real hamon katana, WD-40 will visibly cloud the hadori above the hamon line — and that damage may be irreversible without a professional re-polish.

Storage: horizontal, edge up, in the saya, in a room with stable indoor humidity (40–60% relative humidity is ideal). Avoid basements, garages, attics, and bathrooms — all cycle through humidity extremes that create condensation on bare steel.

Monthly: inspect mekugi pegs for cracks or any looseness. Replace at the first sign of wear — a loose mekugi is the leading cause of injury with a functional katana.

Twice yearly: remove the mekugi, pull the tsuka completely off the nakago, inspect the tang for any moisture or oxidation, re-oil, and reassemble. This level of inspection takes five minutes and can catch moisture damage before it becomes a structural issue.

This routine has protected nihonto for over four centuries. Follow it and your blade will remain in cutting condition for decades.

How do I start tameshigiri?

Tameshigiri (試し斬り — "test cutting") is the live-blade cutting practice that every sword in this collection is built for. A single cut tells you more about your hasuji than ten hours of kata practice in the air. Here is how to approach it systematically as a beginner.

Equipment checklist:

  • full-tang battle ready katana in 1060 or 1095, sharpened from the factory.
  • A cutting stand (dotton) — a wooden post 36–44 inches tall with a vertical slot or spike for mounting targets. Build from a hardware-store 4×4 for under $20, or buy a purpose-made stand for $30–$70.
  • Targets — water bottles to start, then soaked tatami omote.
  • Safety gear — closed-toe boots, long pants, optional eye protection.
  • Space — minimum 15-foot clear radius outdoors, daylight.

Beginner progression:

Phase 1 — Water bottles. Fill 16.9-oz plastic bottles, cap tightly, cut one at a time. Zero edge risk, immediate hasuji feedback — if your angle is off, the bottle spins rather than splits. Spend 20–40 cuts here before advancing. This phase alone teaches alignment faster than any other method.

Phase 2 — Single tatami omote. Soak a rolled mat in water for 24–48 hours. Mount at hip-to-waist height. Cut one at a time. This is where real technique develops — wet tatami approximates limb density and reveals every flaw in alignment, grip, and power transfer.

Phase 3 — Stacked tatami and angle variation. Two or three rolls stacked, plus kesa-giri, gyaku-kesa, horizontal cuts. Builds power and consistency across multiple attack angles.

Advanced — Green bamboo. Only after tatami is clean and consistent. Bamboo chips a hard 1095 or T10 edge instantly on any off-angle cut.

Five common beginner errors:

  1. Chopping instead of slicing. A katana is a draw-cut weapon — the blade slides forward through the target as it descends. Driving straight down with arm power yields poor results.
  2. Constant death grip. The grip should be firm at impact, relaxed during approach and follow-through. A rigid grip kills power transfer.
  3. Cutting with the wrong blade zone. The monouchi — the last 6–10 inches before the kissaki — is the primary cutting zone. Cutting with the middle of the blade loses geometry and leverage.
  4. Watching the blade. Your eyes set your angle. Focus on the exact point you want to cut through.
  5. Cutting while fatigued. Stop at 15–25 focused cuts when starting. Quality beats quantity, always.
Can I use it for martial arts?

Yes, with important qualifications that vary by art form. "Practice" in different Japanese sword traditions means different things.

Tameshigiri arts (Toyama-ryu, Shinkendo, batto-do). These arts are explicitly built around live-blade cutting. A battle ready katana in 1060 or 1095 is exactly the right tool. Most dojos will inspect your sword at the first session — checking full-tang construction, heat treatment, mekugi security, and sharpness. A well-maintained TrueKatana battle-ready sword will pass that inspection with no issue.

Iaido (sword-drawing art). Traditional iaido uses an unsharpened iaito (zinc-aluminum alloy practice sword) for beginners because iaido kata involve solo drawing-and-sheathing motions where mistakes can cause self-injury with a live blade, and some movements pass the blade close to the practitioner's own body. Most iaido schools require students to train on iaito for one to three years before the instructor certifies them for live steel. Advanced practitioners and those studying batto-do variants do use live blades; a sharp katana or spring steel battle-ready piece is the typical choice. Spring steel is particularly well-suited to iaido because its flex recovery eliminates damage from accidental wall or floor contact during kata. Always check with your instructor before bringing any live blade to an iaido class.

Kenjutsu and koryu (classical schools). Practice varies enormously. Some schools train entirely on bokken and shinai and never use live steel in group practice. Others use shinken for specific kata and advanced paired drills. Live-blade partner work is strictly the domain of experienced practitioners under qualified supervision — never something a new buyer should self-initiate. The instructor will specify what the sword must be if live steel is permitted.

Solo cutting at home. This is the most common use case in this collection — self-directed tameshigiri without formal dojo context. No school, instructor, or certification is required. What is required: a proper safety zone, the right targets, and consistent technique discipline. A 1060 carbon steel battle-ready katana is the correct starting platform for this use case.

Summary: solo cutting — start immediately with any sword in this collection. Iaido — start on iaito, check with your instructor first. Formal kenjutsu — follow your school's specific equipment requirements.

Customer Reviews

Cart 0 Items

Your cart is empty